Monday, May 2, 2011

A&S 50 Six: Tablet Weave Satin Effect Band from London Dig MOL 423


The original braid was woven in fine silk and found attached to a bronze strap end which would have been used with a girdle.  Braids of this type gained in popularity and were used for belts up to the early Tudor period.  The satin pattern in accomplished by card idling – only some of the cards are turned with each pick.  While this is quite simple to do the process is actually quite time consuming and I found it very difficult to keep track of where I was in my pattern.
            The cards are all threaded with four stands of plied silk, alternating Z and S.  39 cards were used for the original band.  For my initial attempt at this band, I used size 3 DMC pearle cotton in a salmon pink and black and 24 cards total as I only had 24 cards of the same size at the time.  The cards were from Halcyon Yards, and measured 3 ¼ inches square.  The first two and last two cards were threaded in black, and the remaining 20 cards were threaded in the salmon pink, then all the cards were arranged so they alternated Z and S, as in the threading diagram below:

1


2


3


4


1
2
3
4
5
6
7
8
9
10
11
12
13
14
15
16
17
18
19
20
21
22
23
24

Z
S
Z
S
Z
S
Z
S
Z
S
Z
S
Z
S
Z
S
Z
S
Z
S
Z
S
Z
S

The cards are turned as followed:
            Cards 1, 2, 23, and 24 turn forward every turn
            First turn: All remaining even cards turn forward
            Second turn: All odd card turn forward

I found this band problematic for a number of reasons.  First, I had a great deal of difficulty keeping track of where I was in the pattern when I left my weaving (and even sometimes when I simply looked away).  A more experienced weaver might have fewer problems with this.  I suspect part of the issue is that it takes two turns for any sort of pattern to being to emerge, so it is more difficult to read your weaving and figure out which turn you are on.
            Second, the cards were far too large for my hands, making the turning much more difficult.  Smaller cards would make working with two packs easier.
            Third, I could not sort out an efficient way of handling two packs of cards.  Separating the packs out (one in front and one in back) seems the most efficient but I had trouble getting a clear shed, and again because the cards were large I still had trouble manipulating them.  I ended up turning each card individually which was quite tedious.
            Lastly, the pattern does not show at all well in cotton.  I ended up weaving only a few inches of this band because of the difficult I had with the cards and weaving itself, and the poor appearance of the band in the fiber I had chosen.  I plan to try again using silk now that I have smaller cards and a better idea of how to work with two packs of cards.

Sources:

Crowfoot, Elizabeth.  Textiles and Clothing, c.1150-1450 (Medieval Finds from Excavations in London).  Boydell Press, 2001.

Carolyn Priest-Dorman.  Three Recipes for Fourteenth- and Fifteenth-Century Tablet Weaving.  (http://www.cs.vassar.edu/~capriest/3recipes.html) Last accessed Aug. 31 2010.

Friday, April 29, 2011

The finished Houppeland!

Here it is, in all it's smurfy glory!  I am really pleased with how this gown turned out.  The linen ended up working well, and the gown is very comfortable.  It's very, very blue, but oh well. 


I really need to make a wider belt and a better undergown/scarf/partlet thing for the neck area, but other than that I am quite happy.  As far as the neck filler-inner bit, I had a great deal of trouble with a straight cut scarf.  It kept bunching up funny.  I ended up using a square veil and folding it on the bias kerchief style, which worked well but looked quite bulky.  I think either a partlet type thing or a v-neck under shift will work better in future.

Wednesday, April 27, 2011

New projects

Labor day weekend will be a pretty major event for the SCA kingdom I'm currently living in - the 30 year celebration - so of course there will be an A&S competition.  We finally got the official word as what the competition format would be yesterday, and as I've been sitting here watching TV and hemming I've been mulling over what I might do for my Triathlon entry.  This one is particularly ugly in that I will actually have to do something from three different categories, not just two, so I can't really double up on anything and play to my strengths.  But then again, no one else can either so that sort of works out.

My current plan, given the time constraints and with some consideration to my A&S 50 goals, is as follows:
1. The eyelet brick stitch bag of doom
2. Perugia towel with hand-dyed indigo bits
3. lampwork glass rosary, of the seraphic variety (if I can manage to make that many beads that match)

All of these things date to the early part of the 15th century, which is just about perfect for my actual persona.

The only real issue here is the lampwork rosary.  Lampwork isn't exactly period, though you can apparently produce a period glass bead that way.  I know nothing about period glass work, or bead making in period or out, so this will be a new set of skills, but should be fun and interesting.  I do know they made rosaries out of glass, so that at least is not a problem.

Almost done!

The linen smurf houppeland is almost done!  The collar went together very smoothly yesterday, after some brief debate/argument with myself about how to shape the back.  The later Burgundian style gowns have a pointed collar in back, but as far as I can tell the houppelands do not.  Since this is a transitional style, I have no idea what's going on in back.  Looking at the artwork, it seems to me that the shawl collar is a sort of outgrowth of the fur lining - as the v-neck style starts to appear you see just a narrow bit of fur from the lining that gradually becomes wider and eventually you get a shawl collar.  It makes more sense to me at least for this to happen naturally by just turning things back, especially since in at least one of the examples I posted earlier it looked like there was a small stand-up fur collar on the gown, and the Zhorlecky houppeland has a stand-up collar as well.  So, the rounded back shawl collar won out and the dress is done.  Except for the hem.  I hate hems.  Instead of the hem, I made a small open hood to wear turban-style as seen in the Seven Sacraments alterpeice.  All I have left to do with that is finish stab stitching the edges.  Which I hate less than hemming.

Anyway, the plan for today is to hem the gown and finish the stab stitching on the open hood.  Because of my slight mistake in cutting the triangles, I ended up with less length than I had planed and am going to have to bind the hem for the gown to hit the ground in front.  This is fine, as most of the artwork seems to show the lining wrapping around the front of the hem anyway.  I'm doing this in linen rather than the velvet as the velvet will make the dress stand out funny around the bottom.  The linen should give just a little extra body though, which coupled with the under gown will make the whole thing hang quite nicely once it's on.


What you can't see from the pictures is that once I got the collar attached, I found that I won't need a hook and eye or any closures to keep the dress shut and neat in front!  Yay!  The only thing I loath more than hemming is sewing in hooks and eyes.  No idea what that's all about, but there it is.  The whole thing stays neatly in place with just the weight of the dress and the belt the hold it.  It's kind of a miracle.  I think it has to do with the triangles falling from the neck the way they do, but the weight of the gown is very evenly distributed and not at all cumbersome, unlike my full-circle cut houppeland.  I am going to need a wider and shorter belt to wear with this.  The current plan it to tablet weave something, but I'm not sure yet what.  I really like the wide red belt in the Seven Sacrements detail, but those of you in the SCA know that red belts can be problematic (less so on women in my current Kingdom than where I started out, but that's another subject)

Molly the dog thought I was trying to take pictures of her and kindly obliged by sitting still, for once, so for your edification:

Monday, April 25, 2011

A little progress and some sheep

I didn't get to spend as much time sewing over the weekend as I had hoped.  Saturday wasn't overly productive as I ended up getting dragged to the office by the hubbs after lunch, then vigil mass in the evening, which pretty well took care of the day.  All I did was fiddle with the back of neck, which I cut a little too wide.  Luckily the collar will cover my fix and now I know to cut the back narrower than I think it needs to be for next time.  Sunday I did manage to get the sleeves adjusted and sewn, the velvet cuffs attached, and one sleeve set in before we had to go to the in-laws for dinner and head up to Williamsburg for the Last Aikido Class of the Academic Year (and there was much rejoicing!).

I sewed the lining down on the one sleeves and took some pictures this morning.  What a difference the sleeve makes to the drape!  I really am pleased with how this is coming out.  For outdoor events, this should work out to being a very comfortable gown.

Here is the front view with the sleeve attached.  The center is still caving into the cavity of the dress form, but the draping is working out pretty well:


And the back.  You can see how the gown is folding and rippling better without the caving in issue, and also were I made a little tuck in each side of the neck to narrow it a bit:


On our way to aikido on Sunday we stopped by one of the sheep enclosures in the Williamsburg historic section.  Some of the Leicester longwools have lambed and the lambs were out.  I'm not sure if it's common to the breed, but the ewe's seem to have all twined this year.  There were 2 mamma sheep and 4 lambs in this particular enclosure.   One of the lambs was trying to chew on the a brick wall, which reminded me a little of my dog Molly (a Chihuahua mix who is famous for eating many strange non-food items, and also wasabi).  Sweaters-on-the-hoof are always fun to watch!

Thursday, April 21, 2011

Houppeland progress

So far the houppeland is going very well!  Here you can see what it all looked like before I carved out the shoulder and neck shaping:

The back:
The front:


It's interesting to note that the shoulder seam really has to extend straight out from the neck with no slope at all or the gown won't hang and drape correctly.  You can see this in the diagrams of the original, but now I understand exactly why it was cut that way.  That perpendicular line is part of what makes the nice folds coming from the shoulders.  Cool, huh?

One other key thing I have learned is that the triangular gores really need to be blunted at the top so that they finish with a bit of width, rather than tapering to a point.  Again, you can see this on the original but it wasn't at all clear to me why this was so until I put the back together and everything came to a neat point.  I ended up without much of a neck opening.  Totally fixable, but the the next time around I will cut my triangles with a 1 1/2 straightened off end, and sew all the triangles together before I attach them to the shoulder and center sections (I did this for the front and it went much better).  I ended up losing a little length though, which means I have to do a bound edge for my hem.  This is fine, you can see something similar in lots of the artwork where it looks like the fur lining is pulled around the hem of the gown.

Since I took the pictures, I shaped the neck and armscyes, and put in a facing/lining for the top section and sewed the shoulders.    I am ready to sew the side seams, put in the sleeves and make the collar and cuffs.  My dress form in an antique and has kind of funky shoulders, so I'm having a hard time getting a good picture of what it look likes now (the dress keeps collapsing into the adjustable part of the shoulders on the form).

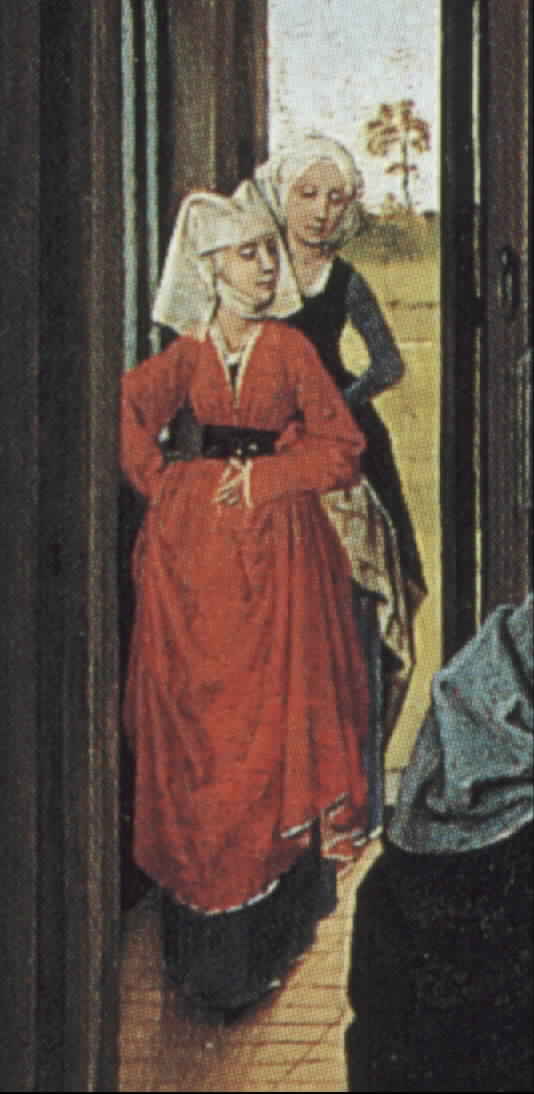
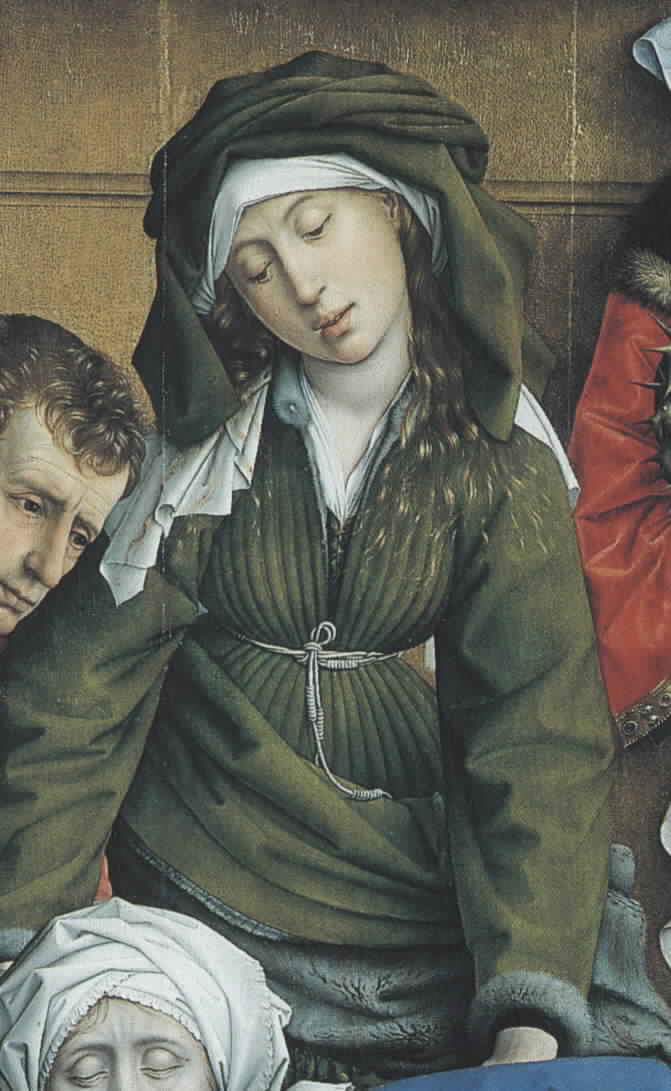
I've found a bit of new inspiration as well in the form of the Seven Sacraments Altarpiece by Rogier van der Weyden (the whole piece can be viewed here, there are quite a few wonderful houppelands in this particular alterpiece).  You can see in the detail pictures below two more houppelands of the general type I like, with some variation in the sleeve - both are narrower in the cuff, but still generally straight (rather than the bag type sleeve seen in earlier decades).  The lady in the turban-like hood with the book has the more transitional style collar with less pleating around the bust line, which is probably closer to what I'll end up with with this particular pattern.


The under-collar on the gold/brown gown is also quite interesting.   In later artwork there is a very transperant partlet type tying worn under some of the gowns, but a placket also shows.  This looks like it's either an under-gown or the precursor to the parlet.  What's interesting to me anyway is that there's no hint of a fitted gown (unlike the lady in the blue) or a placket.  So, either the white bit is covering the undergown, or something strange is going on under there. It seems more likely that the white bit would be covering the under-gown, given that the houppeland is fur lined and would be hard to clean, it seems like some sort of layer to keep body oils off the fur around the neck area would be a good idea.  There seems to be a similar sort of under-collar/parlet on the blue gown as well but worn under the under-gown.  I wonder if this is the chemise/smock or a separate partlet?

Tuesday, April 19, 2011

Hiding from the scissors, redux

It took me a few days, but I finally got over my scissor-phobia and cut out the Zhorelecky houppeland.  Yay!  It wasn't nearly as bad as I had feared and actually went really quickly once I got going.  Given how many bits and pieces there are (18 pieces for the body of the gown, plus sleeves), I was surprised how quickly I got the whole thing cut out.


I got the back sewn together this afternoon and I think the heavy linen is going work out pretty well.  Not perfectly, but because it's not a full-circle pattern and my bust is somewhat ample I'm not getting a huge amount of pleating above where the belt will sit anyway.  Once I get the shoulders fit properly and try it with the right under-dress this will of course change a bit and I may decide I need to line the front and back anyway, but so far I think it will fold and pleat well enough.  Next time I do this, I may end up cutting the gores a little wider, or using more of them to get more folds across the front.  

I should be able to get the rest of the dress sewn together tomorrow and take some pictures before I set in the sleeves and start fiddling around with the collar and such.   The plan is to get this done so I can test drive it at the next event I go to, which will either be Crown in two weeks, or maybe a school demo on the 29th if all goes well.

Wednesday, April 13, 2011

Afraid of the scissors

I've been staring at my cutting diagram for my blue linen houppeland for days now and hiding from the scissors.  It's not so much that I'm worried about the choice of fabric, or even the cutting diagram, it's this dress:


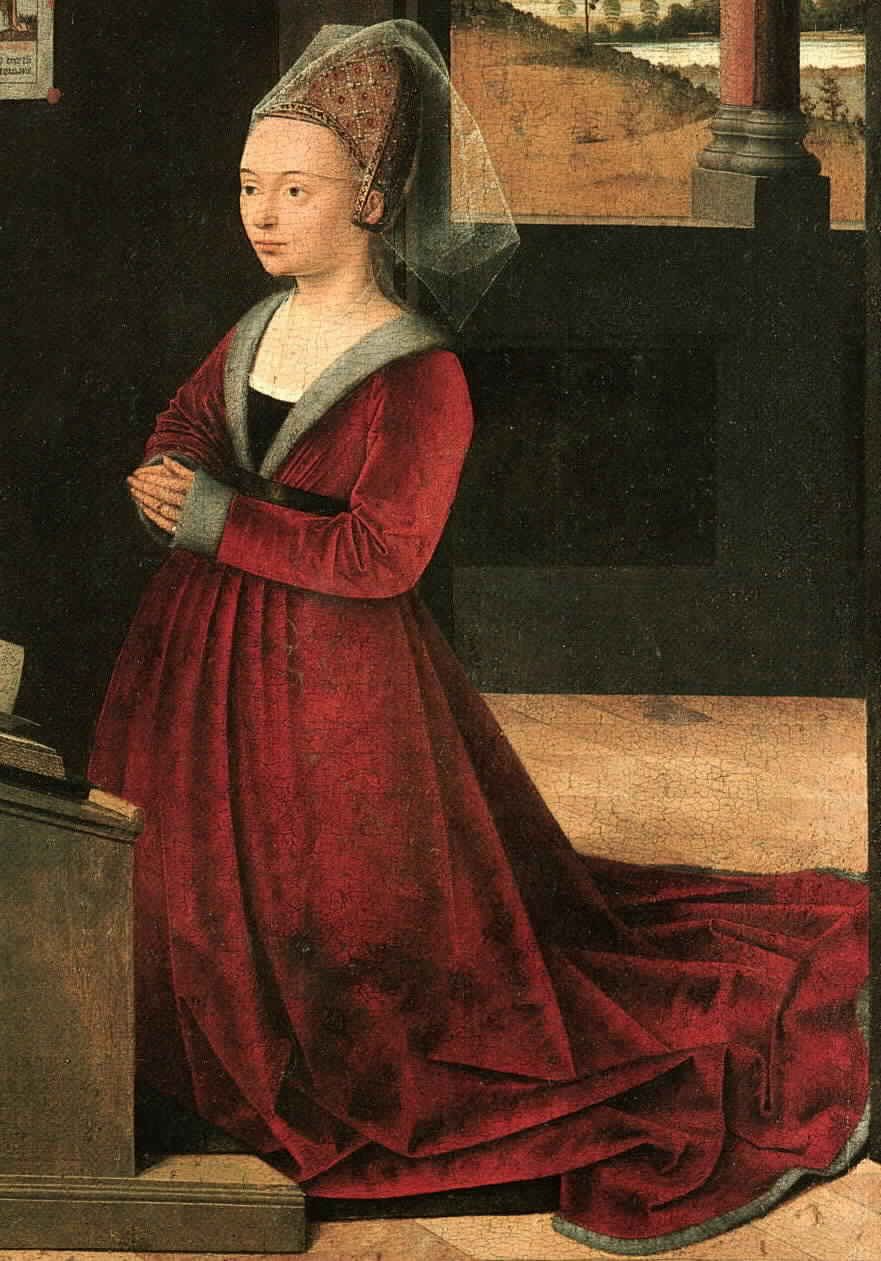
It's just a couple of years later than the wider sleeved red dress I posted about earlier but MUCH closer in style to the Burgundian gowns that the houppeland eventually morphed in to.  And I really like it.  It's pretty.  The neckline is nice, the sleeves are the perfect sort of tight for my chubby arms, and it will also keep fitting (I think) as I gradually shrink.  I keep coming back to this picture.  It might just be the red velvet, maybe it's the hat, but eventually I need this dress.

Looking at the paining, it appears that the fullness of the gown is starting a bit lower down than on the ginormous houp's of a few years earlier, giving a smoother fit over the bust area but still some fullness and soft gathering just above where the belt is controlling everything.  I think my same pattern layout will still work here, especially since I'm using linen and not a thicker wool or velvet like in the painting.  Since the neckline will get carved out a little differently, that should shift things and smoother it out in front the way I need it to, if I'm getting my head around all this right.  Of course, I can't see the back of the dress but I doubt it's got much pleating and folding above the belt in back either.

Maybe I need to go with a Greenland style cut for this shape? There's a good example of that approach on Matilda la Zouche's LJ which looks like it's hanging correctly for this style.  Or fiddle with the shape or placement of the triangles?  Or just dive end and see what I end up with?  I'll get either this one or the other one, either of which is good and wearable, and have learned something that will help with the next one in the process.

Sunday, April 10, 2011

More sheep

Here's a picture of Rome, the ram who I'm pretty sure provide my lovely hog island fleece.  He wasn't feeling too well the day we visited.


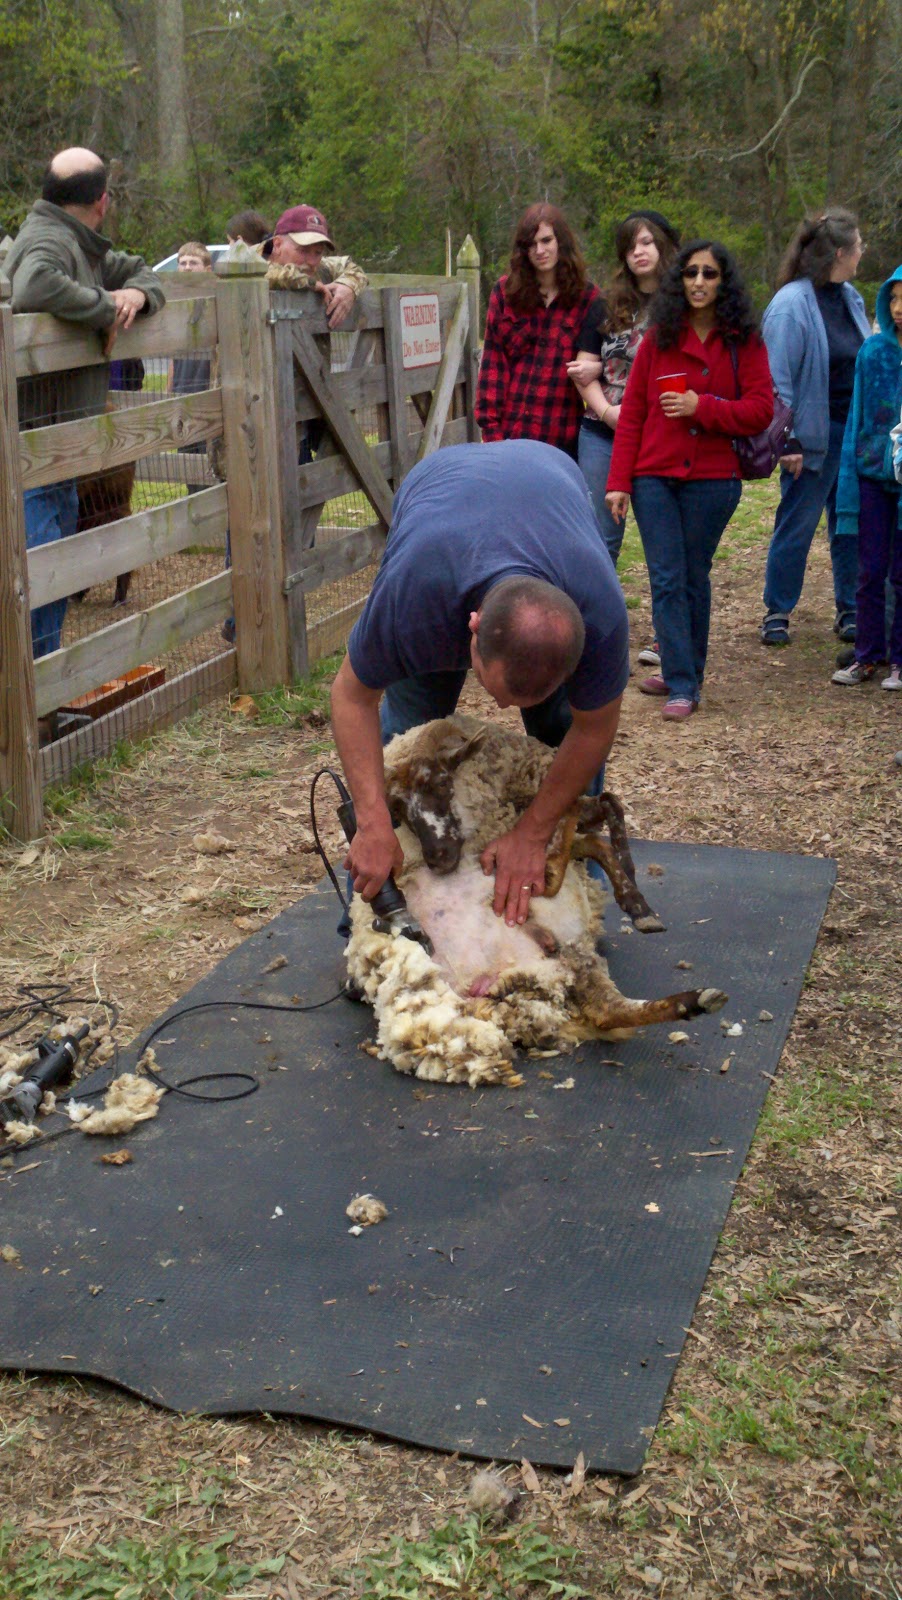
Some pictures of the alpaca and sheep shearing, just because they are fun.  The sheep shearing looked an awful lot like some of the locks and pins we use in aikido...who knew there was such a thing a sheep-jutsu?


Sheep!

Yesterday the Hubbs and I went to the Fancy Fiber Fiesta at Chippokes Plantation State Park in Surry, VA.  They had lots of alpaca farms visiting, and were doing alpaca shearing, which was interesting, but what got me really excited was the small flock of hog island sheep  that live at the park and are a permanent part of the Farm and Forestry Museum.  I got interested in rare breed sheep shortly after I got interested in spinning in the first place, and hog island are some of the rarest, plus they are an American rare breed.  And they are cute.  And the flock had had just had several lambs.  One of which was being bottle fed so was quite tame.  Rare sheep, plus lambs, plus a tame lamb!  It was the trifecta of sheepy-fun!  And to top it all off I scored a whole hog island fleece all for me!  Yay!  I'm pretty sure it came off the ram, given how big it is.  The lady who gave (Gave!! We gave them a nice donation) it to me was pretty sure it came from either him or the larger ewe, but once I unrolled it, the thing is huge.  And heavy.  So I'm pretty sure it's the ram.  His name is Romeo.  I'll post a picture of him as soon as it uploads from my phone.

Some of the sheep:
The fleece, partly unfolded, pre-skirting and pre-washing:

And an alpaca, because they are cute too:

The fleece is in pretty good shape.  It from last years shearing, so I need to get it skirted and washed, like, yesterday.  So far so good though.  It looks like they got the major poopy bits taken off so all I've been picking out so far is the really gross bits, VM, some feed corn (whatever, I guess someone was a sloppy eater), and really short cuts of wool that are just going to pill up.  I've got the fist load already washed up and drying and it looks quite nice.  I think it will need a second trip through the wash (I only did one wash and one rinse this time) and nearly all the yellowish color has come out leaving a nice snowy white fleece.  The staple length is about 4 inches, and the crimp is very fine and tight, similar to the shetland I was working with for the Greenland hood, but the hairs are not as fine.

I think it will work up into a nice soft, lofty yarn.   Right now, the plan is to drum card it and spin it with a short draw, aiming for a semi-worsted yarn.    I'm not sure if I want to use this for knitting or weaving yet, or maybe some of both.  I have enough, I should be able to some of both.  The breed isn't a Medieval sheep, but I think for most things no one other than me (and maybe 4 other crazy people) will care, so I could use it for an SCA weaving project.  Which means more singles for weaving.  I'm not sure how the drum-carding will effect the yarns suitability for warp though, it seems like a semi-worsted yarn might not be a sturdy as a true worsted.  I guess that's what wool-flavored jello is for!

I also got 8 ounces of really lovely alpaca sliver to make an ear-warmer headband thing for the Hubbs out of, and maybe some fingerless fliptop mittens as well, if he's really good.  I HATE making gloves, the little finger holes are a huge PITA, but he really wants gloves he can text in.  So, yeah.  At least it's only half a finger.  I love spinning alpaca.  I've just got to do this thicker than the spiderweb lace I usually end up with when I spin alpaca on auto-pilot.  Maybe a lower wheel ratio?  That's been working well for me on my warps, I at least have to pay more attention to what I'm doing and not rely totally on feel.

Friday, April 8, 2011

Time to sew!

My person in the the SCA was created all because of a painting, which is as good a reason as any I suppose but does sort of limit my clothing options if I want to be true to my inspiration.  It's all about the 1430's style houppelandes.  I was lucky enough to take a wonderful class on houppelandes at the last Atlantia university where I learned about an actual, real live extant houppelande!  No more of this theorizing about full circles with holes cut into them (which never made sense to me and didn't work right when I tried it anyway), now we Know.  Well, we Know at least how one was made, which is something.  See the houpeland of Jan Zhorelecky.  There is a line drawing of the pattern here which was included in the class handout but I'm not really sure where this originated as I can't find it in the Czech website.  Oh that I had a Tardis to translate all these languages for me!

Anyway.  Here is The Madgelen Reading, which I include because she is reason for my persona (late 14th cen/early 15th cen Flemmish):


A full length of the view of the dress I am currently aiming for:

A close-up view of something similar showing a possible collar option:


The thing to note here is that these gowns are clearly all wool or velvet.  And fur-lined. Totally unsuitable for wear in Virginia in the summer.  So.  Not so much going to be doing that.  A tropical wool would be perfectly comfortable, but I would have to line it in pretty substantial linen to get even close to the right drape, so rather than have a double layer and it still be too thin I'm just going to make this first experiment with the pattern in linen.  The lady in red's dress does not seem too substantial, so I think if I use some nice heavy-ish linen I already have and do a nice deep hem facing I should be ok.  Not perfect and not 100% authentic, but neither is wearing a houppeland in Virginia humidity.  The linen is a nice blue color, and I think I will do a collar and cuff facing in black velveteen.  That will give me some more bulk, look a little richer than more linen, and still be washable.

All that's left is to get myself a nice wide belt.  I have a black leather belt with nice pewter belt that I can use, but that's technically my husbands.  He doesn't wear it often, but I really should have a nice belt of my own for this.  Besides, it gives me an excuse to tablet weave something and go belt fitting shopping.  I've just got to decide what size silk to use, or if this silk and wool blend that I already have will work well for a belt.

Now I shall bust out my handy graph paper and figure out how I will cut this thing out. 

* updated to add that I got the cutting layout sorted out but I am now cranky at whoever at the local Hancock did my fabric cutting.  The 6 yards I had bought, which would have been enough, was cut so crookedly that I really only have 5 1/2 yards of fabric, which is barely enough.    Grr.  I think I can do this still.  If the measurements given for the original panel widths are correct, all will be well.  Otherwise I will end up with lots of narrow blue triangles.  And no sleeves.  I really do think a 204 inch hem is enough though.

Wednesday, April 6, 2011

More reflections on the hood project

Now that I've had time to think things through a little, here are some more thoughts on the hood project, most of which were the result of my conversation with the judges:

1. Changing your natural spinning direction and WPI is actually quite difficult.  I’m not sure if this is a mark of how poor a spinner I really am, but I tend to fall into a set thickness for my singles (and I would assume also twists per inch).  There is some variance for fiber type and preparation but I spin pretty consistently and automatically at one thread size.  Trying to vary that so the yarn can be used for some other defined purpose was much harder than I had thought it would be.  Throw into the mix changing twist direction and woo-boy!  The spinning for this project required a lot more thinking and concentration than I have become accustomed to giving over to the task.  It turns out that, for me at least, my fingers have gotten trained to feel twist build up and control the drafting process almost automatically, but only going in one direction.  Switching things up required going back a few steps and really paying attention to small details.

2. Spinning for knitting will tolerate a good deal more inconsistency than spinning for weaving.  I think this is particularly true when making a plied yarn, though as I have not yet tried to make a plied yarn that will eventually be a warp yarn I’m not 100% sure about this.  Weak spots in weaving, particularly for the warp, are really unforgiving since everything is under tension so it seems like what you can bury in your plies for a knitting yarn would still be a problem for your warps, rather than one ply reinforcing the other.

3. There are many fine opportunities for yarns to unspin (or overspin) themselves in the weaving process.  Hence the need for sizing, and careful winding-on of bobbins.  Once I figured this out my bobbin winding process improved considerably and with less unspinning.

On a related side note, pictures of the hand-bound book which was the prize can be found here (if Live Journal is working).  More about the lady who made the book can be found on her web site which has pictures of lots of truly awe-inspiring stuff!

Monday, April 4, 2011

Competition Report

It went well, really well!  As in, somehow, I won!  Hurray!  I'm sort of stunned by the whole thing.  I think I might have squeaked a little when I realized they were announcing I had won, and I know there were a lot of Kermit-arms from several directions.  Everyone worked really hard on their entry, so actually winning feels like a huge accomplishment.  And humbling.

Plus the prize was awesome.  The lady running the whole thing had hand-bound a book and done all kind of beautiful and amazing painting on the covers and along the edges of the pages.  It's really beautiful.  I need to make a bag and a book rest for it, a perfect a excuse to try another one of the brick stitch patterns I've been looking at actually.  I can't bring myself to make another bag, but a book rest would be perfect and worthy of the book.

Now I've got to finalize plans for the raw wool competition at Sapphire in May, which will be last at Baronial Champion, and get started on some woven napkins for a feast gear basket we'll be raffling off as a fundraiser for the barony at our upcoming birthday event.  Plus some tablet weaving (I need a couple of belts and filet for my veils along with a good Viking demo project) and some garb.  But mostly it should all be fun/display stuff for a little while.  I just need to finish the eyelet-bag-of-doom and I will have a nice display for Pennsic.  After that, I have no set plans for anything and that's a fine place to be.

Friday, April 1, 2011

Hood is done!

And I mean really and truly done!  The documentation is linked to the right for those so inclined to weaving geekery.  Here is the final product:


I'm very happy with this how this came out.  The results of the Z/S experiment were not nearly as impressive to look at, but I think I have some ideas about the whole thing.  The short version is (and more on this later as I will do a separate write-up for my A&S 50 list) that there is really no difference in the visual appearance of the fabric when you have Z warp and S weft vs. Z warp and Z weft, BUT the Z/S combo seems to produce a loftier, fuller cloth that would presumably be warmer.  It *might* also be softer, but that particular result wasn't reproducible with the supplies I had on hand so I will have to do some more experimenting.  Oh darn.

Now I must get myself packed up for the weekend!  I'm feeling marginally less nervous about this thing now that it's all done and I've gotten a look at the whole project laid out on a table. 

Wednesday, March 30, 2011

Hrm

I have finished the Sample Weaving of Doom.  It was...anti-climactic?  I'm not sure.  It might be that the result of the experiment is that one sample is softer than the other, and thus better for next-to-skin wear, but it might also be that this is an aberration due to my inconsistent spinning and not the reason for the weave structure at all.  I'm taking the swatches to activities night tomorrow to see if anyone else can see any difference.  The softer thing sort of makes structural sense, but I did a second sample using a different bit of wool (same breed, different color, thus somewhat different characteristics and not a perfect comparison) and I can barely tell a difference, which just confused matters. 

Anyway, I'm glad to have that done.  I've got to wrap up the writing part of the project and get everything packed up and then I'm done.  Yay!  Except for a small bit of hand-sewing, but that will take maybe an hour or two in the morning.

The problem with being done, or close to it anyway, is that I now have space to get nervous about the actual competition.  I'm still a little worried that my project is not a mighty enough effort for this thing.  It's not shiny or glittery or flashy.  Of course, I'll be judged by people who know about weaving and that sort of thing so presumably they won't be as distracted by glitter or the lack thereof.  And I should get some good feedback in any case, which is all for the good.

Sample with Z warp and S weft:


Sample with Z warp and Z weft (no idea what happened to my selvedge on this one, oh well, I sorted myself out eventually)  The bit at the bottom is done with the same commercial Z spun superwash I use for the actual hood:

Selvedge Theories

While waiting for my yarn-jello to dry* I decided to do some research on the trust Inter-web to see if I could figure out why I have been having problems with floating selvedges on my twill weave.  I firmly believe there must be a Rule, and it must one that can be simply stated.  Seriously, it's a 4-shaft pattern, the variables are the directions from which I throw the shuttle, where in the treadle pattern I start, and which direction I decide the treadle.  How many ways to screw this up are there? (no comments from the math people)

I have found the following two possible Statements of the Rule which I will have to test out. First, from Gilmarka's Weaving FAQ:
"If you are weaving twill and that uncaught selvage thread is part of the design and must be caught, start the shuttle on a different treadle or from the other side. It will usually catch if you start in a different place in the weave. If the first and last threads of the warp are on odd and even shafts, the weft will catch all the selvage threads as needed, but you need to start with the first weft over the threads on the even shafts..."
I'm not sure what they mean but "start with the weft over the threads on the even shafts" since when you weave twill the tie up is always going to have one even and one odd shaft, so 1-2, 2-3, 3-4, 4-1.  Maybe you have to start on 2-3?  This makes sense, but also does not take into account the direction from which I am throwing my shuttle.  Unless it makes no difference.

Second, we have the Alaskan Fiber Arts tips page:
"In weaving a Twill, 2/2 or whatever, on a 4 harness loom, use:
  • Thread left side on an even shaft, 2 or 4.
  • Thread right side on an odd shaft, 1 or 3.
This catches the selvedges on both sides. This is the way it's threaded even if it's out of the pattern sequence. No floaters to fuss with, no wasted thread. For a 8 harness loom, use:
  • Left side ends on an even numbered shaft. (2, 4, 6, 8)
  • Right side ends on an odd numbered shaft (1, 3, 5, 7)
So let's do a little 2/2 twill threading on a four shaft loom here:
1, 2, 3, 4, 1, 2, 3, 4, 1, 2, 3, 4, 1, 2, 3, 4, 1, 2, 3, 4
Ok, this is the way it would be if threaded straight across, yes? You're looking at the loom from the front, the 1 is on the left, the 4 is on the right. But this should leave a dropped (not caught) warp thread, most likely the 1 on the left. (Assuming you start throwing the shuttle from the right.)
So to fix it so that doesn't happen, thread like this:
4, 2, 3, 4, 1, 2, 3, 4, 1, 2, 3, 4, 1, 2, 3, 4, 1, 2, 3, 1
The main thing about it is to have that last warp thread out of sequence."
Thinking about this, I *think* it's just possible they are saying the same thing, more or less.  It seems like the Alaskan approach might work better if you are doing a diamond twill or herringbone or some other pattern that changes directions.  I know it's possible to do a straight 1,2,3,4,1,2,3,4 threading and get a perfectly neat selvedge with no floats, as I have done it, I just can't figure out how to state the rule for when this will happen and when it won't.

*No, I did not use jello, I used gelatin, it just sounds better to say yarn-jello.  Besides, the left over sizing smelled and looked an awful like like sheep flavored jello once it set up

Tuesday, March 29, 2011

Ugh

Things on the hood front are not going well.
Well, that's not fair to say.  The HOOD is fine.  It's the sample weaving that's giving me grief.  This, from the draft of my documentation:

            "The weaving was set up with a tablet woven starting boarder, as would be used on a warp weighted loom.  Sufficient warp was measured out for all my sample weaving, and wound round the bottom of a bead weaving frame, and the starting boarded sewn to the top beam.  My initial plan was to use the frame to needle-weave my sample pieces, as the samples did not need to be large and this would produce less waste of my handspun warp than threading my larger floor loom.
            The tablet woven starting boarder proved to be quite simple to do, though this is without a doubt a two-person process.  I had help from my Laurel, who has had a great deal of experience with warp weighted looms, so the process was relatively quick and simple.  Ends per inch are easily controlled by a combination of hand control of the tablet weaving and the yarn used to weave boarder.  Getting the right distribution of ends per inch for the warp was quite simple, once we left out using thick knitting yarn and used a finer lace weight knitting yarn (the same yarn I used the sew the finished hood) to weave the starting boarder.  Once we finished weaving, we wound the warp and I was ready to go.
Unfortunately, the bead frame broke when I attempted to retension the warp after I started to weave and noticed that one side was significantly looser than the other.   I removed the warp from the bead frame and tied the starting boarder to my floor looms apron bar, hoping that I could thread the warps through the heddles to speed along my weaving, and tension the warp ends with weights.  At this point, I realized that not sizing the warp yarn was a critical mistake.  The warps began to un-spin themselves as I removed them from the loom and either broke or twisted around each other hopelessly as I attempted to feed them through my heedless.  I gave up on the loom heddles, and tried to simply weight the warp ends and tie up each warp to the heddle shafts with threads, much in the same way a warp weighted loom would be tied up.  I was not able to get a shed when I tredled the loom, I think because the string heddles were attached only at the top at the shaft frame, so I returned to needle weaving.
By this point, my intact warp has been reduced by half and was in pretty poor shape.  Threads had begun breaking and I was having problems with sticking and threads twisting across each other, so I attempting to size the warp with hairspray.  This did help, but the process was so slow and painful I opted to give up, size the rest of the Gotland warp I had left over, and start again using the floor loom.
In the midst of all this, I also discovered that my S-spun Shetland was somewhat underspun and tends to break with very little provocation.  This may prove to be less of an issue with a more stable and less grabby warp, but I will wind them off the bobbin and steam the yarn while I am sizing the warps to set the twist."

And here are some pictures.  First, the tablet woven starting border, becasue it's cool and looks so neat and tidy at this stage:


The hot mess it became:


And finally the hem for the face opening of the hood to prove that I am not actually totally inept.  Not toally.


So now I have spun a bit more Gotland warps and sized them in gelatin.  When that is done, I will warp the floor loom and hopefully things will go smoothly from there.  I have learned that if you are going to weave with handspun singles, for the love of all that's good and right with the world, size the daylights out of the yarn!!

Monday, March 28, 2011

The end is nigh!

Well, the end of this hood project anyway!  It's morphed into experiments with the actual Greenland twill, which makes for a more interesting project.

Anyway, the hood itself is done.  Yay!  It turns out the hood I had decided to reproduce (largely because of all the weaving mistakes, it made me feel better) was child-sized, so I've decided to make an actual-sized hood as well out of commercial fabric as a point of size comparison.  That will be easy enough as the whole thing is only 14 1/2 inches high, which just leaves the sample weaving to finish.

I went over to my laurel's house (and boy does it sound strange to say "my laurel" still!) yesterday to get the sample weaving set up and learned how to set up a warp weighted loom, which was lots of fun.  The tablet woven starting band process is remarkably efficient and spaced the my handspun warps perfectly without even thinking about it.  We wound the warp on to a bead loom which I had had floating around for ages and I was brought it home and started needle weaving, only to discover that the warp was wound on unevenly enough to be a major problem.  When I went to fix it, the loom broke.  Gah.  I can fix the loom, but not in time to get the weaving done.  So now I have the whole thing tied onto my floor loom in a sort of modified warp-weighted setup, only the middle section got all messed up when I thought I was being clever by trying to put it through the heddles the make the weaving go faster.   Luckily the piece is wider than I needed and I'm able to work with a half width and still get a workable sample, which is all I need, off the intact section of warp.  I'm working on tying it to the heddle frames with string heddles to get some kind of shed then I can get going with the weaving.  It's been frusterating to say the least, but I think I have a workable plan and this should work.

Next time I'm working with handspun singles, I will find a way to block and size the yarn before I warp.  Serious sizing.  Lots and lots of sizing.  Sticky wool with over-twist is a major PITA.

Edited to add that the string heddles aren't working terribly well, I think because they need to be anchored top AND bottom (duh, but now I know), and because the wool is uber-sticky.  However, I discovered that a pointy stick wroks wonders, as I can weave the pattern and the  turn it to create a nice shed I can pass a small bobbin through so I am on way to the craft store to a bone folder.  The little hole at the end of my stick shuttle/beater combo is getting in the way of the weaving process so the folder should be perfect.  I will not be defeated!!

Wednesday, March 23, 2011

Hood progress

Just a quick update on the Hood Of Doom...it's nearly done!  I'm sewing the hems in today in between bouts of finishing up a doggie sweater commission/donation, then all I have left is to weave the hand spun sample swatches, spiff up the documentation, and put this thing to bed.  I think I just might make it!

So far, the worst thing, other than cutting into the hand woven cloth (cuz there is No More if you screw something up) has been some major problems with fraying.  I think because I ended up using a superwash yarn for the weft it didn't mesh in with the warp well and just wants to work itself loos if you look at it funny.  I can't think of any other reason for it.  I ended up having a hard time with the seam finishing, the originals weren't actually flat-felled, just stitched then closely overcast down over the raw edge, but that wasn't going to work so I had to flat-fell anyway.  Even then there are a few spots on the gussets where I'm a little worried.  Luckily it's not a high stress point so it should be fine.  I think I managed to secure everything pretty well and it should hold up just fine, even if it the seams are a touch bulkier than they should be.  Oh well.

Saturday, March 12, 2011

Greenland cloth is done!

Not quite sure how this happened but I managed to finish the weaving for my Greenland project yesterday!  Hurray!  There are some mistakes, which I am hoping will be less obvious once I get the hood cut out, but overall it looks pretty good and had a wonderful drape to it.  As compared to the less-packed weft sample, the difference in hand is really quite remarkable.  I sort of think that might be part of the reason for the packed weft - the cloth is both warm and light weight.

I did have some problems with selvage threads breaking on me.  I think this is because of friction on the outermost warp thread coming through the reed and a little too munch tension on the outside warp bundles, as I had only a couple of other problems and those were mostly when I was threading and got a little goofy with the snips, and one warp that got tangled on something and broke under tension.  My tensioning issues all worked themselves out when I washed the cloth, so yay for wool!

Some pictures of the finished product, it's still a little rumpled from the wash but you can get the idea.  You can see where I forgot to weave in a broken warp in the top shot, and the contract between the two different wefts I used in the bottom shot:


Wednesday, March 9, 2011

One step forward, two back?

This Greenland project is giving me a huge amount of grief.  Aside from the loom breaking when my car was in the shop and the warp giving me untold trouble, I ran into two more problems since my last post.

First, and probably the worst and most demoralizing, I lost an entire days worth of work on my documentation.  It was a concerted day's effort too, I was pretty well done with two full sections when my husband decided that it was time to upgrade my hard drive.  It turns out the old one was failing, but due to the failing and the way it was partitioned, the backups had not worked properly and skipped over a bunch of files, including my documentation.  It ended up reverting to the version I had pre-Sunday edits, which was very rudimentary.  I then spent Monday and part of Tuesday without a computer at all, and will be back to the state soon as I'm getting a new one (which will NOT be partitioned) tonight.

Second, I busted out the ruler and checked my weft thread count on the sample and found that I was getting nothing like the packed weft in the original Greenland cloth with the yarns I was using, so I had to go on a foraging trip to see what I could find that might work better.  Luckily I hit pay-dirt on the first try.  I'm now using a lace-weight merino single and getting 20 to 21 wefts per inch, as opposed to the 14 I was getting before.  Much better!  Even the color of the cloth on the loom is looking better.

So I'm well over a week behind, and feeling discouraged and demoralized, but I guess all I can do is keep pushing forward and do my best.  It's been a learning experience anyway.  I think I need to seriously reevaluate the way I estimate how long a project is going to take.  It's one thing is things go as planned but quite another when Life gets in the way.

Here you can see the fabric in progress with the new weft yarn:

Sunday, March 6, 2011

Greenland progress!

For some reason I could not sleep at all this morning, so I got up and finished dressing the floor loom and finally got the first inch or so of weaving done for my Coronation A&S project.  Yay!  Finally!  I'm feeling much MUCH better about that whole thing now.  I talked with one of the other entrants yesterday about the competition, and aside from realizing that I have a very low opinion of the impact my own work makes on people, got a much better idea of what to expect and am less worried about the whole thing.  We are supposed to send the documentation in 2 weeks before the competition so the judges can read it ahead of time, which is great, but as the project won't be done there are some things I won't be able to include.  Little stuff like my conclusions.  We came to the conclusion that this was going to have to be ok, since neither one of us can do anything about that (she's cooking, and you can't really include the recipes until AFTER you have cooked the food) and the missing bits won't be more than a few pages anyway.

Aside from having a rather embarrassing episode of spatial dyslexia last week  when trying to figure out the twist direction of the yarn I'm using (I could not get my head around the idea that the twist direction is the same regardless of which way the thread is running, I'm chalking that up to a low-caffeine moment, though it was useful in the end), I'm now trying to sort out the Truth of Twill.  For some reason, when I start the first inch or so this morning I had a floating warp thread on either end of my cloth that wasn't getting picked up by the weft.  When I revered my treadle direction, everything was fine.  There's some relationship between the direction of threading, treadling, and the direction of the throw that I'm just not connecting in my head.  I understand what needs to be happening, it's just how to make it happen in a pattern that's messing with me.  This is only my second project where any of these things have mattered though, so I suppose it's ok that I don't understand every last thing about weave structure.

Here you can see my progress so far.  It looks ok as far as twill fabric goes, but I'm not 100% happy with how the balance is in comparison to the photographs of the Greenland fabrics.  The weft should be denser, and I just can't get the Shetland to pack any more than you see in these pictures.  I think I'm going to have to dig around a bit and check with the local yarn shops before I weave any further and see if I can't find a somewhat light weight option for the weft, something closer to the pink singles I used on my first twill sample.

Friday, March 4, 2011

Hood weaving update

My current weaving project is cloth for a Greenland hood.  I'm using commercially spun yarn, but trying to get as close to the texture of the original cloth as I can get.  As part of the project, I'm also hoping to spin some samples of Gotland and Shetland (two modern breeds that are purportedly similar to the sheep used by the Greenlanders) and weave some samples to see what sort of difference all this twist direction stuff actually makes.  The project needs to be done by April 2, and the documentation has be done by March 20th.

So far it's been slow going.  The yarn got backordered and delayed (see my eariler post) which put me in a cranky mood, so when the warp did show up I was less than interested in getting started.  I finally got started on Monday, got everything measured, and then went to start threading the loom Tuesday after my taking my car in to get a new tire (the potholes around heat eat tires like nobody's business.  Lesson: low profile tires are a Bad Plan, buy a tractor next time) only to discover that one of the shed frames on my loom had broken and needed to be repaired before I could thread the loom.  I got the car back Wednesday morning, went the hardware store, and got the loom fixed just fine but it set me back two more days and I didn't actually start threading until late Wednesday.  As of last night, I was done with sleighing the reed (I warp front to back for now) and had half the heddles threaded.  Hopefully today I will get the rest of the heddles threaded and enlist some help getting the warp wound on to the back beam tonight so I can start weaving Sunday (Saturday is University so nothing will get done).

Almost a week to warp 3 yards of cloth.  How silly is that? 

I had a total spacial brain-fart last night too and couldn't get my head around the idea that Z is always Z, even if folds over on itself as the yarn goes back and forth in the warp (or weft), or if you start from the other end.  I don't feel too bad, my Laurel got confused too and we had to draw lots of pictures with the help of her husband (a knight, Pelican and woodworker) and even draw lines on a straw and fold in and bend it to convince ourselves that we were being dense.  I felt mildly stupid but questioning things is good, and I did come up with a theory and possible explanation for why the whole Z/S thing matters, which is the point of this whole thing anyway.  I suspect that when you have a Z spun warp and S spun weft the finished cloth will have a smoother finish since all the fibers will end up aligned in the same direction.  More on this when I have pictures, for some reason it makes more sense to me with visual aids!