It's actually getting done, and I'm actually going to make it by the 30 year dead line! Hurray! I've got the lining put together and attached, the side seams stitched, and I'm 2/3rds of the way done with the braided seam finish. The original bag looks like it had a tablet woven edge down the sides, but I'm not that confident with my tablet weaving, so I've opted to the edge finishing I know I can do neatly. The top will get a narrow band of red silk folded over the raw edges, like I talked about in my last post. That band will have worked eyelets to hold the purse strings. Three tassels will finish off the bottom.
You can barely see from the pictures (or in person really) but the bag is faced with a mustard color silk. My original plan had been to use a bright blue to show behind the eyelet holes, but when I looking at it the blue made the whole piece look a little dark and the eyelets didn't pop. The mustard was much better. The Hubs, who insists he is no good at these things, was a huge help. He's actually really good at the whole color theory thing, even the medieval color theory, no matter what he says.
Here you can see a detail of the braided edging. I'm really happy with how the red looks, it's a nice contrast and brings out the small touches of red I already had worked into the design. I'm also very pleased with the pattern matching down the side seams, another feature you don't often see in the extant bags but to modern eyes not matching the pattern can be very off-putting. It's funny sometimes, the things we worry so much about that they just didn't concern themselves with.
Because I know someone will want to know, this type of edge finish is really quite simple to do. It's slow, and you have to be careful to work neatly, but it looks really sharp. Apparently it was used on things other than these bags too, like Viking hoods and such, though I don't have the documentation for that myself. There are a few differant ways to do it, but I follow
these instructions. My only additional tips are to try to make your loops as long as they need to be so you don't have to join new ones half way through, and to wind them onto bobbins. The bobbins keep the extra thread neat, and give you some extra weight to keep the tension on the braid even, which is a huge help. You also need to be careful as you work not to pull things tightly or you will distort the edge of your piece.
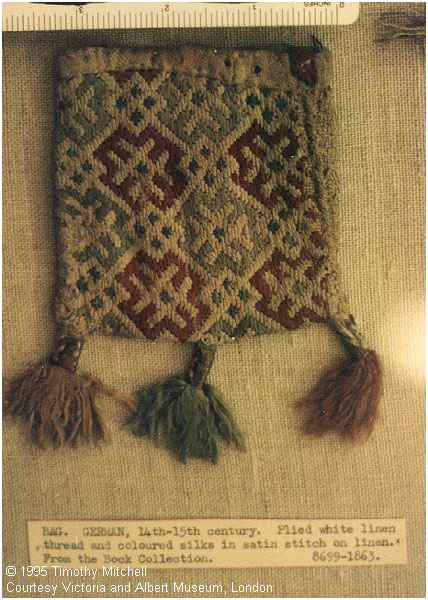
Edited to add: I've been looking at the
online images of the original bag to sort of drawstring placement and I think the top band is actually embroidered, not a sewn on ribbon or tablet weaving after all. If you zoom in on some of the black and white photos, you can see pretty clear plain brick stitch where the holes for the purse strings are, and sections of the ground cloth showing through in places where the embroidery has worn away. Unfortunately I placed my work on the fabric such that I could not do this, so I've gone with the band method seen in the V&S bag, but it is adds another set of options for finishing off the top. The side of bag is presenting a more interesting set of questions. It's hard to tell what's going on in the pictures but it kind of looks more like little buttons or knots running down the side of the bog than tablet weaving or a braided edge. You can sort of see what I mean in the picture to the left, it's more clear on the zoom-able version on RICH website. I'd love to get my hands (or at least my eyes) on the actual bag to see how this is all done, but that will have to wait. In the mean time, I shall proceed as planned. I'm kind of leaning towards leaving off the middle tassel at this point, but we'll see.


