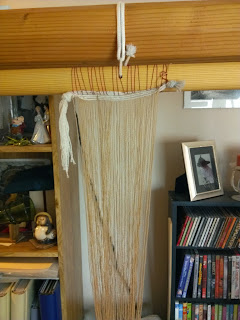
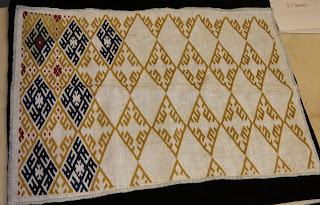
Following up on my last post, I've finished setting up the warp weighted loom that has now taken over a not insignificant portion of my living room and have actually successfully woven a whole inch of leg wrap!
Knitting the heddles was by far the trickiest part of the whole business. Finding clear instructions on how to do this was not so easy, but I managed to work it out for myself after much google searching and watching YouTube videos on knitting heddles for barn looms (not the same sort of heddle at all but it managed to explain the idea). I think the biggest thing left out of the instructions (if you can call them that) that I was able to find is that you really need to work with a small shuttle or netting shuttle, not the ball of yarn. Once I figured this out and got out one of my small table weaving shuttles life was much easier. Also, it was a lot easier (and I do mean A LOT easier, like I might actually do this again easier) to manage everything once I had the idea to pick up the shed I was trying to tie up with a pick up stick and hold it in the forward position with an extra leese stick I tied to my shed stick. This arrangement might not be that clear in the picture, but the idea is to hold the threads in front of the stationary warps so you are not trying to knit the heddles through another set of warp threads. The only problem with this plan is that you have to be extra careful not to twist your warps if you chained them together at the bottom. I twisted a few of them the first time I knit the heddles and ended up having to un-do the heddles AND un-chain the back warp threads to fix the mess. Not a big deal as this is a narrow warp but something to keep in mind time. Knit first, chain second.
Anyway, once that was done (and it went much faster the second time around), the actual weaving has been pretty straight forward. Beating upwards is a little awkward, but I'm actually having a harder time managing the shuttle stick and the sword beater all at the same time. I feel like I need an extra hand. Luckily with this particular yarn I can do most of my beating with the shuttle stick so I'm not having to use the sword much but it's a bit of a juggling act. Overall the process is not any slower than weaving on a rigged heddle loom. You can see we had some trouble with the table woven header on this piece, which has created a little unevenness in the warp spacing, but I think that will work itself out as I go and when I wash the finish piece. Thinking on it, I think I didn't choose a very good yarn to use for the header, it's not quite the right thickness for such a fine warp.
I still can't quite get my head around tying the heddles for complex twills. I know this can be done, all sort of patterned twills were woven on this type of loom, but with one set of warp threads being stationary I'm not quite sure how you would make something like a diamond twill happen. This might be another example of walk-before-you-run, which I have never been very good at. I'll figure it out.
Thursday, November 28, 2013
Monday, November 25, 2013
Warping the Warp Weighted Loom
I got a warp weighted loom for my birthday (yay!) and what with it taking longer than expected to get here, fiber show season, crazy event season, and general life stuff it's taken until today to get started warping it. Very shameful but at least it's getting done. For now I'm just planning to weave some simple tabby legwraps for myself, as this will be relatively easy and I need some legwraps. I'm using an alpaca blend laceweight yarn that was on sale at my local yarn shop. The warp is a honey color and the weft will be a wine red. They should be rather pretty when done.
I've got as far as tying the weights to the warp bundles and chaining the warps together. I was not planning on doing the chaining, but because I ended up sing fewer weights than I had planned the chains are really helping to keep the warp spread evenly. Plus I can anchor the bottom of the work to the sides to the loom which will help prevent draw in. I still need to knit my heddles, once I get that done I can start weaving!
I do have to say, the 5 inch wide warp looks pretty silly on the 4 foot wide loom, but what are you gonna do? Once I get the hang of this I plan to do a large piece of fabric, perhaps for a hood, and that should not look quite so silly.
Wednesday, October 23, 2013
Finished Mammen Coat
I am very pleased with how this coat turned out! The embroidery was fun to do, and not that difficult. It's all stem stitch, just like the original, done in silk. I used a combination of filament and spun silks as that's what I had on hand, sticking fairly close to the original colors. This is the second project where I've been able to use mainly filament and I must say I really do like it. The difference in sheen is remarkable. I did find that I needed to keep my nails in better order when working with the threads and that thread conditioner of some sort helped (no idea if they used this in period on silk or not).
The pattern for the coat is loosely based on the Eura gown. It's sort of a mash-up of the standard Turkish coat and the Eura gown really. I can't say how accurate this is, but it's a plausible way to cut this style of kaftan for a woman, as it would continue to fit as the body changed shape during pregnancy and it fits much better over layers of clothing than the loose standard t-tunic style method of cutting I had used for my last coat. Both of those garments are men's shirts anyway, which I am beginning to think would not have been used for cutting women's garments but more on that latter. The pattern is comfortable, has a nice drape to it, and uses only 2 and a half yards of fabric with no waste (I can get a full length gown out of just over 3 yards of fabric with no waste at all as well).
I fully lined the coat with a silk and linen blend herringbone twill, sewing the lining in as I made the coat itself, the same way many 18th century garments are made. This made it a lot easier to ensure that the lining and the exterior fabric matched up and draped the same way and will keep everything in order as I wear the coat. It also meant I only had to sew any given seam once rather than twice, making the sewing much faster. The neck and cuff edges were then stab stitched closed and the hem will be turned and stitched.
The only tiny issue with how this project turned out is that the sleeves are perhaps an inch or so too long. Really this isn't so bad, since I will be wearing the coat over other clothing and as a warm layer the extra length is probably a good thing, it just makes the thing looks like a monkey coat on the dress form. I need to remember to make this adjustment next time I make a coat though, once I do the cuff embroidery it's very difficult to adjust the sleeve length.
This coat is part of my effort to re-do my Viking kit, since I have shrunk out of my old kit and it wasn't up to my current standards anyway. I've now got two linen Eura gowns to wear under the coat, and will be cutting out a new apron gown based on the Kostrup find. I got a warp-weighted loom for my birthday last month and will be weaving some leg wraps for myself on it as soon as I can get it warped. I have lots of veils and headwraps, and got proper shoes at Pennsic this year, and will be done with my naalbound mittens shortly, so I should be in good shape by the end of the year, barring any major disasters or huge new distractions. At some point I will need to make a new wool overgown as my old one, which I loved, had a laundry disaster and went to live with a teeny tiny friend who fits into it. I have something that will serve in the meantime but it's a blend and if I am working over the fire it gets a bit uncomfortable.
Thursday, October 17, 2013
War of Wings Feast
This year at War of the Wings (a kingdom war here in Atlantia that takes place every October) I decided to spend Friday cooking a period feast over the firepit using as many period cooking techniques as I could. I only used one modern sauce pan and a single dutch oven (which isn't the worst concession to modernity as they had similar things, I just don't happen to own the period equivalent as of yet).
The meal turned out really well. The biggest disaster turned out to be the guest list, we had some missing people and ended up with a lot more leftover than planned but that's not so bad. People wandering by were pretty impressed that we had a high table set up in camp in such a primitive camp site. The food turned out well, everyone enjoyed it, and no one got sick, so I count that as a win! Here's what we ate -
Bread - I made a honey wheat bread in the dutch oven. While not necessarily a period bread recipe, baking in the coals is a period method and it was a lot of fun. The first loaf turned out beautifully except that it got charred on the crusts. I ended up giving it to the rest of camp and they made quick work of the inside of the loaf, leaving a scary carbonized crust. The second loaf sort of collapsed a bit in the middle but baked perfectly and was still tasty. I think the over wasn't quite hot enough but as this was the first time I had baked in the dutch over on my own I think it went pretty well.
Birds on the Spit - I spit roasted 3 chickens on the spit my cousin made me for Christmas. These turned out quite nicely and the spit worked great, though they didn't cook as evenly as I would have liked. I think the spit was overloaded. Next time I'll limit myself to 2 birds at a time.
Pumps - Medieval meatballs. These are really tasty and were a big hit. I've made these twice before and decided to double up the recipe this time, which turned out ok but if I do this again I will need a bigger pot as they didn't cook as evenly as I would like. The balls need more room to float around in the broth.
Buttered Worts - I used spinach this time, though you can use a range of leafy greens for this dish. Last time I did this I had spinach and mustard greens which was quite nice. This time I simplified the cooking, sauteing the leeks in a large pan over the fire in butter, then adding the greens then a bit of the stock from the pumpes. When the greens were done I dumped everything over the sopes. Very good and much easier than all the boiling, though I suppose the boiling may be necessary for some greens.
Roasted Turnips - again simplified the preparation by turning this into a single-step baking process, baking it in the dutch oven. Worked fine and was very tasty.
Lumdardy Tart (beet pie) - Yum! People had no idea this was beets until I told them. To be fair, there is some debate about whether the recipe refers to beet root or beet greens. I used beet root, and more than called for than the redaction linked, and it was good. I've seen other people use Swiss chard, which might be interesting to try some time, but this is a tasty version that people like.
Apple Muse - Basically applesauce, with a twist. If you can't get saunders, I would suggest cutting back on the honey and being careful with the saffron, perhaps adding a bit more salt. Do NOT use food coloring, the saunders is doing more than adding color (I found this out the hard way the last time I made it). It was a very nice dish a good way to end the meal, and is REALLY nice with a bit of heavy cream and powder blanch on top. Be sure to use the best apples you can get.
Pears in Syrup - I like to add cinnamon, galangal, mace and a bit of nutmeg to the spice mix and try to always use turbinado or demara sugar for the extra flavor. The leftover are killer on french vanilla ice cream. This makes for a nice, light-ish dessert and is very easy to cool over the fire, you can set it in the cooling coals and pretty well forget about it until you are ready to plate it.
Tuesday, October 15, 2013
Mammen coat progress
The embroidery for my Mammen coat is coming along very nicely. I am looking forward to being able to wear this and show it off. The colors look a bit Crayola-like, but that seems to be the aesthetic, and it is rather striking. Much more so than a modern palate of colors would be. Perhaps this means I'm developing a more refined period color sensibility.
Anyway, the neck is done and I am very pleased. I had to improvise a bit with the back of the neck and the end of the face section and leaving them both plain didn't look quite right. Keeping things simple seemed like the best plan. I think it turned out well. The sleeves are coming along really well. I ended up changing the colors a little bit. Both pieces are very close to the colors used in the original fragments, with a few variations to accommodate the silks I had available.
Sunday, September 22, 2013
Mammen Masks
I had so much fun making the elevation coat/caftan that I decided to make one for me. This time I am using motifs from the Mammen embroidery to decorate the neck and cuffs. The small masks will go on the neck edges down to where the brooch will sit, I could (and probably should) go all the way down the front but (a) I find that rather heavy looking on the lighter colored wool and (b) I am lazy. I'll be using the acanthus vine motif on the cuffs, changing the color scheme just a little bit to correspond with the silks I have available.
The threads are a combination of filament silk and spun silk. The filament looks much nicer and seems to wear better, you really can barely tell the difference between the spun and regular DMC cotton, which is deeply annoying to me but this is all left overs from other projects so it's not so bad. I'm really happy with how this is looking so far. The stitching is also going fairly quickly which is a nice change from some of my recent projects.
Sadly I don't have a picture of the totally done elevation coat, but you can get a general idea of what I did from the pictures. I'm very pleased with the design I came up with for the cuffs. My original plan for the neck was more elaborate and I think would have been more effective but the lady who received the coat was thrilled with it as is, so it all worked out. Trying to sew a garment without measurements is bad enough, but when it's for something like a Laurel elevation, when it's going to be seen by literally EVERYONE and you really do want the person to be happy with it, it's a little scary. I'm very glad she was so happy and that it fit so well.
Thursday, August 29, 2013
Stitching away
I should never ever bemoan not having enough to do! I'm now back to hiding from the calendar. In addition to a fiber show at the end of September (how is that only 2 days away?!) and co-teaching a class on tailoring and fitting for an SCA university on the 7th I'm also working on a Laurel elevation coat which needs to be done by the 14th. I will post pictures after the elevation, as it's a surprise, but wow time is not my friend this week. I'm really hoping that my doctors can figure out what is causing me to need a nap after a couple of hours of not very strenuous work because this is getting ridiculous.
The coat itself is a lot of fun and pretty straight forward. The sewing isn't a big deal, it's getting the embroidery done that's a bit of a challenge. I'm trying to keep it simple, just doing outlines for the design and a little bit of fill all in pretty filament silk on the nice wool I was given to use on the sleeve cuffs and at the neck. So far it's looking really nice and I'm quite pleased. As long as I don't get crazy with putting more elements on the coat, I should be fine.
I love working with the silk, the filament is so very much nicer than the spun stuff I had been working with. It's a little trickier to work with but the end result is much nicer and actually looks different than regular DMC cotton, so it's the worth the little extra effort (mostly in making sure my nails and cuticles are snag-free). Having to mail order sucks, but I did finally find a good color card for Soie de Paris on-line (it's part of the Soie D'Alger card, the number in bold are the Soie de paris) which makes mail-ordering a lot less stressful.
Saturday, August 17, 2013
Some good resources
Here are a couple of great links that some of you may be interested in -
For the late-period enthusiast, Drea Leed has made her out of print book on 16th century Flemish working-class costume the Well Dress'd Peasant available in PDF format at http://www.elizabethancostume.net/welldressdpeasant.pdf.
If you are interested in Vikings, the best research summation I have seen thus far on apron dresses and under-gowns can be found here - http://urd.priv.no/viking/ She's got a lot of other great links and resources as well, all grounded in good archaeology.
Friday, August 16, 2013
Pennsic Project ADD
Second attempt at a sprang bag |
My ghetto light-box - a desk lap under my glass top desk. Ugly, but fictional! |
Sunday, August 11, 2013
Naked Underwater Linen Weaving
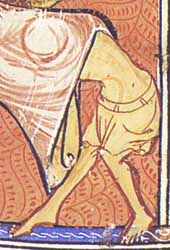
In one of my books, which I can't seem to put my hands on at the moment, there is a very silly picture of a guy sitting at loom in his drawers and nothing else weaving linen in a pool of water. I now understand exactly why he is doing this. I finally sat down this morning to work on the long-languishing Perugia towel and holy cow does weaving that blasted linen ever work better if it's damp! Hurray for naked under water linen weaving!
It's also helping that I took a friends recommendation to use paperclips and small weights to keep the floating warp in place. It was tending to get lost in the first few warp threads, making my selvages messy and ugly. With the clips on I am getting a much neater edge. I've decided to abandon the idea of doing a proper Perugia towel with the pick-up brocaded sections though, that's just not working well on this particular loom and I have other things I want to weave sometime in the next year, so I'm doing a faux-rugia instead. I'll just be weaving in some stripes of the indigo dyed cotton at either end. Given that my edges are still kind of funky looking, I am happy with this compromise. Just getting this linen woven off will be a huge accomplishment. It's still slow going but now that I have my handy spray bottle (and some flax seed sizing, that's a big help too) it's a whole lot easier to make progress.
Edited to add that I found the picture of the naked underwater linen weaver! It's in the Textile Production at Coppergate book, plate 821, which you used to be able download here but seems to be currently unavailable.
Saturday, July 20, 2013
Off the deep end?
In what might be a sign that I've gone off the period-underpants deep end, I found myself thinking as I was working on my last pair of braies: "Oh these will my sexy pants! The linen is so sheer!"
Giant baggy linen boxer shorts, no matter how sheer, are not sexy. I must write that out somewhere.
Wednesday, July 17, 2013
Spanish Fashion Victim
Because I leave for Pennsic in less than 5 days, I've decided I need a new dress. Obviously. :) To be specific, I need an obnoxious parti-colored bias cut plaid dress, such as were popular for about 20 minutes in late 14th century Spain. Leave it to the Spanish to come up with the craziest of fashion trends.
Anyway, I have the gown out and about half way put together, I'm doing this by machine partly because I have only a few days but mostly because the fabric is mainly cotton. It was either that or heavy wool coating and I'm not about to wear heavy plaid wool in the middle of July in Pennsylvania. The plaid is cotton and the solid kermit green is a cotton linen blend, since that is what they had at the fabric store in a decent selection of colors. The colors remind me of Kermit and Miss. Piggy for some reason, I'm quite pleased with them even if the whole thing leans a bit towards the obnoxious (isn't that the point though?)
What I am trying to decide at the moment is how to close the front. Based on the picture, it sort of looks like the gown is probably laced up either in front or down the sides and there does not seem to be a visible undergown. It's a little hard to tell and I have not been able to find a higher res version of this image to see if there is any more detail. Because the fabric is not so very sturdy I will be wearing a supportive layer underneath, I'm wondering how I ought to close this thing up. I'm leaning towards buttons even though I really can't find any suggestion that this is how this sort of gown would have been closed that way. It would certainly be easier for my purposes. A laced overgown over a laced undergown sounds like a big PITA.
Tuesday, July 16, 2013
Totally finished book cushion of doom!
All together, this blasted thing took 175 hours and 5 minutes to embroider and another 8 hours 45 minutes for finishing (that includes carding wool for the stuffing, sewing the interior pillow, constructing the whole thing and doing the braided edging). I cannot being to express how glad I am that this project is done. At some point today I actually had the rather distressing thought that making another cushion for my chair might be a good plan. God help me.
I'm not sure what the next big project will be. Probably the Mary of Hungary smocking, now that I've got past the planning stage and got this done actually tackling the stitching sounds a lot more appealing. I've got a couple of other smocking projects I want to work on as well as some weaving things that have been set aside while I've been trying to get this done, plus I need to get back on track with my A&S 50 stuff. Lots of possibilities! And yay for getting a big thing done and off my plate!
Saturday, July 6, 2013
OMG it's done! Now what?
Just over 175 hours later and I've finally finished the embroidery for this blasted book cushion! Yay! I'm sort of in shock, truth be told. I've been working on this stupid thing for so long it feels sort of strange to actually be done with it. Well, done in the done with the embroidery part sense of done. I need to actually make it into a cushion but that should be fairly straightforward. I'm not going to do anything overly complicated. I'm planning to back the embroidery with linen, make the back of the cushion from blue silk, and stuff the thing with wool then finish the edge with a nice bit the same embroidered braided edging I've used on the bags. A red edge should bring the whole thing together and brighten it up just a little bit.
Tuesday, July 2, 2013
Book Cushion - getting there
150 hours 35 minutes into this project and the end is in sight. Sort of. I'm more than halfway done with the fill-in and making good progress. My goal it to get this done so I can put it on display at Pennsic, which means I need to be done by the time I leave on the 23rd. I think I can do it, I just need to stay focused and work for a few hours each day. At least I can see my progress as I'm working. It helps to play games with myself and set a goal for the day (fill in one diamond, two diamonds, whatever).
Overall I'm pretty happy with how it's looking. I've found some mistakes that are annoying me towards where I started the piece, but there's not much I can do about that now. You really can't see them unless you look super hard so it's not a big deal. Certainly nothing that detracts from success of the piece. The only issue I really have is that the color values seem somehow off. It was all good until I started in on the green, then the gold got sort of washed out. I'm not really sure if if the green needed to be lighter or a brighter shade, or if I should have gone with a different color or perhaps a lighter blue or tone the whole thing down, but it does look good with the book that it's meant to go with.
Maybe I'm just nit-picking. I do tend to do that.
Friday, June 28, 2013
All is well
I've been madly busy with getting ready for my first trip to Pennsic (hooray!!) in a couple of weeks, finishing up some long-delayed commissioned work, keeping up with orders from my little knitting bag business, and trying to work through some less-than-fun health issues which has left little time or energy for keep up to date on my blog.
In the midst of all this, the DH lost his job. He found a new one quickly, and ended up being out of work for just under a month, but it derailed a number of things, not least of which was a much-longed for move back to California. At some level I had never really believed it would happen, but I've wanted to go back home so badly for so long it was still a blow to have even the chance of it happening finally taken away. I hate living in Virginia for to many reasons to list, now I really have no choice but to learn to live with the bugs and bigots and miserable weather and the crap shopping.
At least I get to go to Pennsic. I am really looking forward to that. With a little bit of luck I will have the book cushion finished and ready to put into the A&S display fully finished too! It's coming along quite nicely, I've got all of the pattern stitching done and am just past halfway done filling in the background. Once I get that done, the finishing should go fairly quickly. I'm not planning anything too elaborate, just a simple braided edge. I am really looking forward to getting this thing done, partly because I'm sick of looking at it and want to move on to something else, but partly because it actually looking pretty cool and I want to put it to use.
Thursday, April 11, 2013
More book cushion progress!
Slowly but surely I am making progress on the brick stitch book cushion. I finally have all of the major pattern element in place. Hurray! What you see has taken 100 hours 20 minutes to complete. The blue medallions ended up being far more time consuming than I had thought they would be, taking between an hour and a half to two hours each. The red flowers and filling in should go much faster, there is far less counting to do now so I expect to get this bugger done soon. Then I just have to decided how to do the finishing. It definitely needs some big tassels at the corners.
Monday, April 8, 2013
Pattern Darning for Mary of Hungary Smock
Finally I am starting to make some progress on the long-stalled Mary of Hungary smock! A big part of my problem has been sourcing materials, namely the silk. Part of the issue was, I think, that I was not 100% happy with the quality of the linen I had for the smock. It was a good handkerchief weight, but very slubby and poor quality (as has been most of what I have gotten from fabric-store.com recently, fine for a smock but not good at all for fine needlework or anything I want to last). A friend placed a large order with Gray Line Linens, and I got some of their handkerchief linen to replace it and Oh My Gawd it is lovely. Perferct for this project and all of my Brigitta coifs where I have been struggling with the uneven quality of threads on the other stuff. I am never going back. Beautiful stuff.
Anyway, having got that out of the way I suddenly found myself motivated to do the sampling with the slik threads I have already got last night and *gasp* threw them in the wash this morning. Putting filament silk in the washer and dryer is about the scariest thing I have ever in my life done, but wouldn't you know it, they came out beautifully! I'm not saying this smock is going to get heavy laundering every single time I wear it, but it's good to know when it get's dirty, and it will, I can clean it! In looking at the sample I much prefer the look of the more delicate Soie de Paris, which is the darker gold color on the top. I think it will fill in the pattern better than the more tightly twisted Soie Gobelin bellow it, even though that was easier to work with and strikes me as more durable. Both retained their sheen beautifully, even though I went on autopilot and put Biz in the wash (not a good idea with silk or wool in the mix) and machine dried it (admittedly on low). Neither color bled in the least. The grey lines you see are my smocking dot marks, I used non-washable marking pen on the sample fabric.
Now all I need to do is cut out the smock and get the pieces finished so I can start the embroidery. I should be able to do that while I wait for the silk to get here. The front, back and sleeves are constructed and finished separately and embroidered before being joined together at the shoulders and underarm seams, which makes a great deal of sense. There is a huge amount of fabric to pleat, so that alone will take some time. I went ahead and got iron-on smocking dots, which I know is a no-period cheat but the smock take just over 6 yards of fabric and I may be insane but marking dots on that much fabric by hand is beyond what even I am willing to do in the name of an authentic experience!
Saturday, March 30, 2013
Like a hole in the head
I went to a beginning scribal schola in Maryland a couple of weeks ago with a couple of people in my local SCA group, and oh good grief did I need that like another hole my head. One of ladies I went with is our current baroness, and she and I had been talking about our lack of local scribes and need to do something about this, so we thought it might be a good idea to at least learn some calligraphy so we could make up some simple award scrolls. Hah. When I started playing with the books I promised myself (and my dining room table) that I would not, under any circumstances, start messing around with the calligraphy and illumination.
So much for that.
This is fun! My first attempt you can see here, is not that great, but it's not that bad either. I freely admit that the calligraphy style and the illumination style do not, chronologically speaking, match, but it seems I like the round calligraphy hands and the bar and ivy boarders are pretty easy to make look nice and the two just aren't found together in nature. It seems like you get horrible boarders or horrible calligraphy, though I think I may have found some nice, not painful Carolingian boarders like this one at the British Library to go with my not-so-horrible calligraphy so that's something. I've got a lot of room for improvement but for a first-ever try, I am not totally ashamed.
Now to put away the paint and get the hems on the pile of gowns I'm working on done. I've got a fitted gown for the aforementioned baroness to finish off, a gown based on one of the styles seen in the Morgan Bible for next week to finish for me, the under gown for the Morgan dress to assemble and finish, and hemming to do on attempt one at a bliaut or at least something close to one. And then Monday I'm off to an all-day napkin hemming party. If I never hem again...
Wednesday, March 6, 2013
Filament silk questions
I ordered a small sampling of silks from Hedgehog Handworks (very nice folks with a great selection of metal threads and the full Au Ver a Soi line). Playing around with the Soie de Paris, I am now in love with filament silk. What was I thinking with stupid old spun silk? Really? I might as well have been using cotton. Oh, that's right, I can get it easily without all this on-line color card nonsense!
Anyway, for those of you have have greater filament silk wisdom than I (not hard I freely confess), I have questions! First of all, I am looking for something suitable for doing the pattern daring on the Mary of Hungary smock. I think silk would work best, and there really is no point in using silk unless I use filament, but it's also a smock and white and will thus need to be washed. Let's face it, sauce will end up on the front of it at some point. What is going to happen to the filament when I wash it? Will it be a tragic loss? Or will it be ok? I'm ok with handwashing, just not so much drycleaning.
Second, has anyone used the kanagawa embroidery silks? These are Japanese silks, and come on 20m cards, which is more length than you get with the Soie de Paris (5m spools), I'm just not sure if it's plied the same way, or how it compares. I would assume it a good quality thread since that's what they use for the amazing silk embroidery they do in Japan, which is more complex than the opus anglicanum I want to do.
And lastly, when doing medieval style silk shading, how many shades of silk do you really need? The technical references I have assume you have an insane palette of threads I am guessing would not be available to the medieval embroiderer, and most of the extant pieces I've been able to find decent pictures of don't seen that detailed or sophisticated in the shading but it's hard to tell when looking at pictures on computer screens.
Sunday, February 24, 2013
Translation, anyone?
A friend who knows about my dog-barding project shared this with me and it cracked me up. Seriously, barding on a cow?! Wow. Sadly I do not read German at all so I have no idea why on earth this manuscript is showing such a thing, but it's pretty entertaining. If anyone out there can translate the inscription I would really appreciate it!
At least I now know putting barding on my chihuahua is not that ridiculous an idea after all!
Friday, February 22, 2013
New project ideas!
I gave a presentation last night on the Morgan Bible, sometimes better known as the Maciejowski Bible, for my local SCA group. The Morgan is the theme for our next big event, which is also out kingdom's spring coronation, so I'm hoping that at least one or two people were able to get inspired to make something based on the manuscript. I certainty did, but sadly as I am running the competition I can't enter. Boo! At least it takes the pressure off needing to get a project finished by a deadline, though that can be a really good thing sometimes (witness, the never ending book cushion).
Anyway, I've been wanting to do an almoners bag or something similar in opus anglicanum for awhile. It's not the easiest technique ever but I enjoy it and getting to work with metal threads for the background will be fun. I found a miniature in Morgan of David of Bathsheba getting married that I really like, I think if I take out most of the background/side people, including the crazy uncle giving Bathsheba bunny ears, and just use the central couple, who have lots of nice graceful folds in their cloths perfect for silk shading, it would make a nice piece.
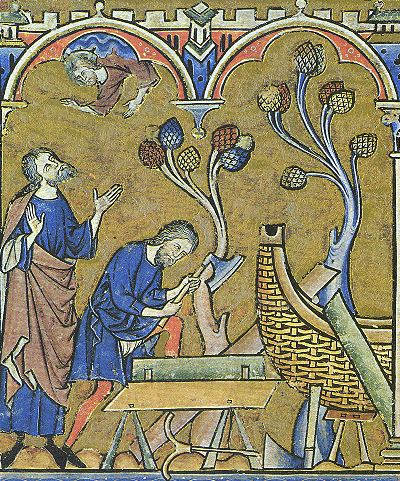
Since just a pair of people standing there would make a boring piece, I want to incorporate a frame made out of some of the funny gumdrop/Lorax looking trees that show up all over the place in the manuscript. I'm not sure how best to stitch them but I will figure it out. They have a lot of fine detail in the bud sections, maybe some form of couching?
The fun part is planning out what to stitch. The less fun part is the silks. There is a wonderful post over at opusanglicanum on just this very subject, suggesting (quite brilliantly) silk tram as an affordably embroidery thread. Sadly I can't find anywhere in the States yet to get this from, and mail ordering from the UK makes it about as expensive as getting the soi de algiers. Unless of course I order a truck load of the stuff. I'm also not in love the soi de algiers color cards, or lack thereof, so picking out colors is tricky. Locally all I can get is spun silk which lacks luster and except for being silk might as well be cotton. It has a nicer hand when finished but lacks any real difference in visual impact making the huge difference in cost totally pointless.
What I would not give for a good, local needle working store! I don't mind paying tax, but paying shipping over and over again just because I didn't get a color right or need one more spool or something is really irritating.
Anyway, I've been wanting to do an almoners bag or something similar in opus anglicanum for awhile. It's not the easiest technique ever but I enjoy it and getting to work with metal threads for the background will be fun. I found a miniature in Morgan of David of Bathsheba getting married that I really like, I think if I take out most of the background/side people, including the crazy uncle giving Bathsheba bunny ears, and just use the central couple, who have lots of nice graceful folds in their cloths perfect for silk shading, it would make a nice piece.
Since just a pair of people standing there would make a boring piece, I want to incorporate a frame made out of some of the funny gumdrop/Lorax looking trees that show up all over the place in the manuscript. I'm not sure how best to stitch them but I will figure it out. They have a lot of fine detail in the bud sections, maybe some form of couching?
The fun part is planning out what to stitch. The less fun part is the silks. There is a wonderful post over at opusanglicanum on just this very subject, suggesting (quite brilliantly) silk tram as an affordably embroidery thread. Sadly I can't find anywhere in the States yet to get this from, and mail ordering from the UK makes it about as expensive as getting the soi de algiers. Unless of course I order a truck load of the stuff. I'm also not in love the soi de algiers color cards, or lack thereof, so picking out colors is tricky. Locally all I can get is spun silk which lacks luster and except for being silk might as well be cotton. It has a nicer hand when finished but lacks any real difference in visual impact making the huge difference in cost totally pointless.
What I would not give for a good, local needle working store! I don't mind paying tax, but paying shipping over and over again just because I didn't get a color right or need one more spool or something is really irritating.
Thursday, February 14, 2013
More books
This book things is totally addictive. I finished the rounded spine journal, and posted start-to-finish photos on facebook, which you can see here. I'm very happy with how the whole thing came out and it was a lot of fun to do. While I was waiting for the glue to dry I did some poking around on the web to see what I could find out about proper medieval bindings and I'm looking forward to trying some of those out. They appear to be a bit more complicated, and the boards are made from actual wood, but this all makes sense given that the books inside were so precious. The limp bindings are also really interesting and though they seem simple there is a lot of interesting and rather beautiful stitching going on on many of them.
I think the biggest problem is going to be figuring out what to do with all of these journals.
Wednesday, February 13, 2013
More coptic stitch books
Again with the modern covers, but as these are just for practice that's ok! I'm having a lot of fun with the sewing and the gluing. The cherry blossom paper is left over from my wedding favors and the sheep are from my scrapbooking paper fabric. And hello, sheep! I do love the sheep (but not in a creepy or gross way). I think these came out very well, I like the hard covers. I'm even more pleased with the end papers on these books, which of course I didn't take pictures of. Hopefully I will get around to it with the next batch of books. The sheep have a stripped black paper and I used a green textured Japanese bamboo leaf paper for the cherry blossoms. Both turned out quite nice and have a wonderful tactile quality that I wasn't really trying to accomplish but am very happy with. I do need to find some better paper for the signatures I used resume paper for these two books since I had that in the house and it's ok to write on, but I really need to figure out something nicer that I can hopefully find locally.
Next up is the round spine journal, which I understand is a proper, period technique, even if the kit I have is not using period materials, and the limp binding kit I got at KASF which is actually totally period. One of them will end up being my new comment book for A&S competitions and displays, depending on how they turn out. Right now I am leaning towards the round spine journal, it's less period but smaller and will take up less space on the table which can be a serious issue in some cases.
Tuesday, February 12, 2013
Something completely different
The DH and I went to LA this weekend, partly to visit with my family and partly to work on Top Secret Project Number 1 (more on that later). It was a nice trip, even if I did bring the cold weather with me and of course no coat. Who bring a coat to Southern California? Seriously?
Anyway, my cousin's girlfriend was teaching a class on Coptic bookbinding at this amazing little place called The Makery (if you are in the LA/Orange County area, check it out! very cool space) on Saturday and since I was there I signed up. Yay for bookbinding! How did I not get to do this sooner? Sewing AND glue? Seriously? It's my two most favorite things ever, all in one place! I'm now super bummer I never took any book arts classes as an undergrad, there was apparently amazing book arts programs at my undergrad college. Oh well.
Anyway, here is my first ever attempt at book binding. It's not a period book, obviously but the techniques used to make it are all period. I'm pretty pleased with myself. I've already got two more (modern) books started with hard, paper-covered covers. I also picked up a long-arm kit from Mistress Aneira at KASF that is totally period so I will get started on that in the next day or two. I also ordered another kit for a rounded back journal from Hollanders that should be fun. I don't know what I am going to do with all of these hand-bound journals, I'm sure I'll think of something. Making them is sort of addictive.
Tuesday, February 5, 2013
Needle case
I've been wanting to make a Viking-style needle case that would suspend from one of my apron brooches for a very long time. A number of these things have been found, most of which are just little tubs of metal with bits of wool shoved inside. To hold needles, all you need to do is poke the needle into the wool. Sometimes the needle case has nothing more than a small hole with a wire loop to suspend it from something, others have elaborate wire wrappings to make suspension loops. There is a great write-up on needle cases here - http://www.stringpage.com/viking/needlecase.html and another even better and longer one that I now cannot find but will link to when I track it down again.
Anyway, what I've come up with isn't quite right but it will get the job done and is a reasonable approximation of what it should be. I used a bit of metal tubing from the local hardware store and some jewelry wire to make thing, plus a bit of solder to keep the wire from sliding off the tube. My wrapping is just not that great. Instead of using a plain chain to suspend the case, I made a beaded chain with some beautiful lamp worked beads made by a local lamp-worker who was selling them at KASF this weekend.
What I find most entertaining about this particular needle case is that when suspended from my brooch, it ends up in exactly the place where I usually stick needles in my shirt. I did not plan this but it's terribly convenient. Also, you don't have the un-thread the needle when you put it away, you can just sort of wrap the thread around the end of the case, which actually makes it easier to get the needle out should you somehow shove it too far into the wool. Some of the extant cases have a little cuff of wire around the end of the tube, which is pretty and decorative but also make doing this little bit of thread wrapping much easier.
Monday, February 4, 2013
Toiling Away
This book cushion project is starting to feel like one of the Labors of Hercules. Or possibly the torment of Sisyphus. I've finally got all of the gold colored sections stitched in correctly, which is good as that has established the much smaller areas I need to deal with for the blue twisted cross sections, but for some reason I have yet to do a blue medallion without having to pick out at least one of the arms. Each one of those buggers is taking about 2 1/2 hours, sometimes 3. Very annoying. What you see here is 67 hours of work.
Anyway, I took what I had done to Kingdom Arts and Sciences this weekend for my display and got some nice feedback. The lady whose book the cushion is destined to support saw the thing and was excited about it, so that was nice. She also gave me permission to display the book with the cushion when it's all finished, so I feel better about doing that. I have an issue with displaying other people's work along with my own without permission, even if the two things are meant to go together. We also had a nice chat about bookbinding, so I'm going to give that a try. It sounds like fun and I've always liked gluing things together.
Saturday, January 12, 2013
New Needlework Books
The Royal School of Needlework (they of Kate's wedding lace fame) have some out with a series of very affordable, compact instructional books on a range of needlework techniques many of which are if interest to the reenacting crowd. There is one on blackwork, one on goldwork, whitework, stumpwork, silk shading, and a range of other techniques.
I got the volumes on whitework and goldwork as Christmas gifts this year and am very impressed. While not aimed specifically at the historically minded crowd, they cover the actual hows and whys of the subject, as well as bit of history. The instructions are clear and the photography is both beautiful and helpful. They won't take the place of in-person instruction for those who really need it, but if you learn well from books, or have had some class instruction and just need a reminder these are a great resources. And at around $15 new, the prices are great! A lot of other needlework books focus either on history to the exclusion of instruction, or pack in so much information that they overwhelm the reader and it becomes difficult to find the directions you need one how to execute a particular stitch when you need it. These seem to fill the gap quite neatly and should prove to be a valuable reference for both new and experienced needleworkers. The goldwork book in particular has a wonderful section on threads, explaining in detail the difference between all the different types of gold threads and how best to work them. This alone is worth the price of the book, as for whatever reason this very important information seems to be missing from all of the other books on goldwork that I have in my library. Kind of important stuff, and wonderful to have all in one place! The author also does a great job explaining what sorts of working threads to use with the metal and emphasis the need to use the right sorts of needles and reserve needles and scissors for use with metal threads alone (critical, as the metal damages them and makes them useless for more delicate silks and cottons). I am looking forward to picking up the volumes on blackwork and crewel work. |
Monday, January 7, 2013
Why document?
There's been a lot of discussion of late about documentation for A&S projects and it's got me a bit upset. The debate has been running for awhile but it seems to have come to a head recently as the kingdom I live in has recently reworked it's A&S judging forms and given a greater weight to documentation in the scoring, so that it now accounts for 30% of the total score rather than 20% under the old system.
I stepped up as MOAS (minister of art and sciences for the non-SCA folks out there, basically the arts and education coordinator) for my local group a year ago. In that role, I have to run and help judge competitions as well as teach classes and help coordinate some kind of educational program for the barony. For the previous two years I was heavily involved in competitions and displays, first as Baronial A&S Champion and then just because it was fun and I had built up a lot of momentum the year before. There is no way to do any of these things without some form of documentation for your work. There just isn't. I cannot asses the work of another artisan as a judge* if I do not know what that work is supposed to be, where they got the inspiration for it, and at least something about how they made it. I cannot teach a class about a subject that pertains to the middle ages without doing some kind of research and documenting that subject matter, that's sort of the point of teaching the class in the first place. As a competitor, I do myself a disservice if I don't provide at least some basic documentation as I am not providing the judges with information about my work, my skill level, and the processes I used. I have seen artisans judged on aspects of their display rather on the piece they had actually created because they failed to provide documentation and judged more harshly than they would otherwise have been because the judges did not know they were new to the art.
Good documentation does not and should not have to be a 75 page dissertation. With very few exceptions, three written pages and a handful of pictures should be enough to explain what you made, why you made it, and how you did it, and give a little bit of the historical context of the thing in question. Show me, the judge or curious passer-by, that you know where this thing fits into the wider world and give me the information I need to evaluate your work. If it's a perfect replica of a thing in a museum, give me a enough information so that I can see that. Otherwise how will I know? That is all that is needed for this 30% boost in your score.
Novice competitions that require no documentation do no one any good. They only serve to reinforce the idea that documentation is hard and scary and bad, and that A&S competitions are run and judged by mean, scary people who value academic attachments over the craft itself. That's not the case at all. The documentation is what allows us to asses all the other criteria we use for evaluating a thing and an artisans development; craftsmanship, historical accuracy, complexity and even aesthetic value. Documentation is about showing your work, not about writing a thesis, and showing what you have learned in the process of making the thing you are sharing. I have seen more new artisans come away from such competitions frustrated and hurt because their entries were improperly judged, not out of malice or cruelty but because of misunderstanding resulting from lack of documentation in the last year than I care to count. I for one will not do that to any artisan, particularly a novice artisan, and would rather sit them down with a notepad and have them write out at least some basic information about the entry when they drop it off than have them leave something without any supporting documentation at all. It isn't difficult, it won't get them full marks, but it will get them past the idea that documentation is a dirty word and a beyond their capabilities.
*I should note that I personally don't judge very often, save at local events when absolutely necessary, as I am not a member of one of the A&S orders or have any other particular qualifications to do so. I do however talk a lot of my local members down after bad judging experiences and talk to a lot of judges at local event, universities, and any other event where I can or where I have members of my group competing or displaying. I have also been judged both kindly and less so, and solicited feedback from many of my own judges, which is always a good thing to do.
Friday, January 4, 2013
Finished knit bag
The knit bag I last wrote about is done, complete with drawstrings, lining and tassels, just in time for out local 12th Night and the gift basket it is destined for. Yay!
Overall, I'm fairly pleased with it though it has a few composition problems. It's too long for one thing, and something about the color transitions bugs me. It looks better in photographs than in person. Possibly the problem is just that I had the wrong shade of green. Whatever, it's not that bad and I don't think it will annoy anyone other than me. I've already started another bag in wool, just to use up some of the wool I already have, and get a little more complex colorwork practice in before I jump into the silk or cotton. Since the fine silks the original relic bags were knit with is so expensive, I'm thinking I may do one or two with pearl cotton first, or maybe bamboo, as practice, before I invest in lots of expensive silk. We'll see, I have other things to get done before I get to that.
Subscribe to:
Posts (Atom)